
Calibration method of differential pressure sensor sensors
Differential pressure sensors are common in the industry and cover a variety of applications. To understand what a differential pressure sensor is, it is important to set it apart from other types of pressure measurements. The most common types of absolute pressure gauges are gauges and differentials. Gauge pressure: Barometer The pressure difference refers to the barometric pressure (or atmospheric pressure) shown in Figure 1. This is the most common type of pressure gauge in the industry today. (Pressure sensor calibration)
Absolute pressure: Absolute pressure when zero pressure is referred to an absolute vacuum as shown in Figure 1. This is done by drawing a very hard vacuum, approaching the absolute zero as much as possible, and then referring the sensor to zero vacuum. Point. Most absolute sensors use a sensor and a barometer sensor and calculate less pressure by subtracting the barometer pressure from the barometer. Differential pressure: Differential pressure (DP) can be independent of atmospheric and absolute pressures. This pressure difference is applied between the two pressures and as shown in Figure 1. These sensors are very useful in determining the pressure difference between two places or systems and are often used in calculating flow, filters, fluid levels, densities and viscosities

So now that we’ve looked at different types of pressure and we know what differential pressure is and how it compares to other types of pressure measurements. We can now consider how to calibrate a DP sensor and some of the challenges associated with calibrating DP sensors. First, let’s start with the challenges
Common Challenges in Calibrating DP Pressure Sensors
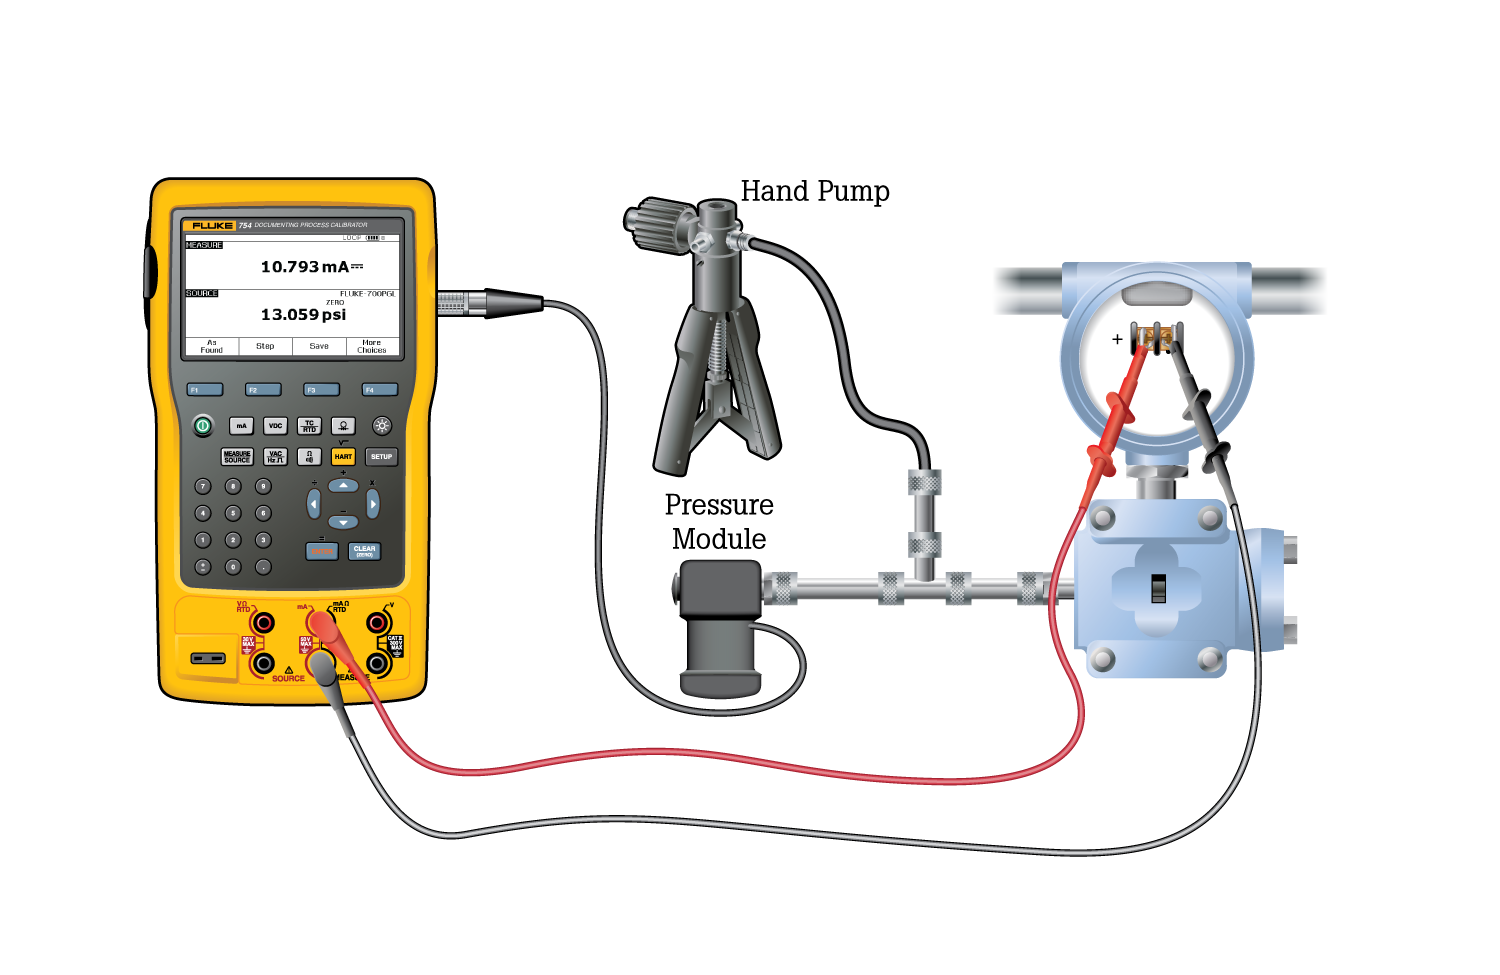
Generate a stable and controlled pressure – To have a meaningful measurement for calibration, we must be able to generate a stable pressure from a source pressure such as a pump or controller. DP sensors can be very sensitive, so a solution that creates and maintains a stable pressure is very important. Also, the pump or controller needs to be clear enough to have exactly the desired pressure points. Generating stable, high-resolution controlled pressure is often a challenge because many pump solutions rely on check valves or non-return valves inside the pump, as shown in Figure 2: DP gauge and pump stability
These checks are prone to leakage over time and use, and are often frustrating when trying to maintain very stable pressures to calibrate DP sensors. Temperature effects – Probably the biggest challenge for calibrating DP sensors is the effect of ambient temperature on the DP sensor and calibration standards. Because many DP sensors measure very low scale pressures (FS), a small change in temperature can be a very significant change in pressure. This temperature change is often equal to the constant instability of the sensor being tested and the calibration standard (both the reference gauge and the pump). Atmospheric pressure change – Several DP sensor manufacturers recommend calibration with a reference port (or low port) to keep the atmosphere open
Calibration methods
Example 1 – Using a pressure pump, a DP reference gauge with a DUT reference port is suitable for the atmosphere

necessary equipment:
-
Low pressure calibration pump
-
The device under test
-
DP reference gauge
-
Lines and fittings for connecting devices to the pump
Connection (see Figure 2)
-
Both top ports are connected to the calibration pump from each gauge
-
The reference or ports at the bottom of each gauge are outdoors
-
Make sure the DUT is in the correct orientation (usually vertical or horizontal)
Method
-
Depending on the DUT, you may need to practice several full-scale gauges
-
Make sure the valve is open and zero, and both the reference and the DUT (assuming the DUT is a digital meter that needs regular zeroing)
-
Close the valve and go to the next calibration points and record the data when the measurement is stable
-
Increase the pressure using the pump and write down the readings on the DUT & Reference gauge
-
Typically, 3-5 calibration points are taken both up and down to determine hysteresis
Advantages:
This method is cheap and easy to set up
Disadvantages:
During the test, pressure gauges and temperature changes must be considered. Depending on the environmental conditions, this can lead to very unstable measurements. This is the least accurate method for calibrating DP sensors
Example 2 – Using a low pressure calibration pump, DP reference gauge with DUT reference ports connected
necessary equipment:
-
Low pressure calibration pump
-
The device under test
-
DP Gage Reference
-
Lines and fittings for connecting the gauges to the pump and the gauges to each other
Connection (see Figure 3)
-
Both top ports are connected to the calibration pump from each gauge
-
The reference ports or bottom of each meter are connected
-
Make sure the DUT is in the correct orientation (usually vertical or horizontal
Note: In this method, pressure is created in both high and low pressure lines and DP is measured by a reference gauge. Depending on the DP domain, the best solution is to achieve the full DUT scale required

- Calibrate the pressure sensorMethod
- Depending on the DUT, you may need to repeat the gauge several times at full scale
- Zero point recording may vary depending on the DUT type. If the DUT is a digital gauge, you must connect the reference gauge and the DUT reference ports and reset both gauges. If the DUT is an analog meter that does not require a normal zero, you must separate both reference ports and leave them blank to reset the meters. After recording the zero point, connect both reference ports and continue through the calibration
- Close the valve and go to the next calibration points and record the data when the measurement is stable
- Increase the pressure using the pump and write down the readings on the DUT & Reference gauge
- Typically, 3-5 calibration points are taken both up and down to determine hysteresis
Advantages:
This method is cheaper and better for changes in atmospheric pressure during the test. Stability improves everywhere in the first example
Disadvantages:
This set is more complex than the first example, and the effects of temperature can potentially have a greater effect than the first example because we have a sealed system with few (reference) lines connected
Example 3 – Using automatic calibration equipment
necessary equipment
- Automatic calibration
- The device under test
- Lines and fittings for connecting the DP gauge to the calibration
Connection (see Figure 4)
- Connect the top port of the DP gauge to the OUTLET port of the automatic calibration equipment
- Connect the bottom port of the DP gauge to the REF port of the automatic calibration equipment
- Make sure the DUT is in the correct orientation (usually vertical or horizontal)

Method
-
Depending on the DUT, you may need to practice the gauge several times on a full scale
-
Schedule a task and run an automated test that automatically generates pressure, stabilizes the measurement, and allows the DP to be measured
-
Typically, 3-5 calibration points are taken both upwards and downwards, and the calibration automatically calculates the hysteresis and displays the test results with a pass / no display criterion
Advantages:
This method is completely semi-automatic depending on the DUT. The measurements are controlled and the stability is provided by the calibration controller. Calibration is affected by temperature change and barometric pressure compared to previous samples. Results are automatically displayed and calculated. Calibration can calibrate gauge and transmitter pressure
Disadvantages:
This equipment is more expensive than previous models